


How To Apply Your Decal
Email: info@ cheekymonkeys.co.nz
Online Company, Located New Zealand
Free standard shipping
on all orders over $100
Email response within
48 Hours
Step by Step Instructions
How To Apply your Decal – Instructional Video
Sometimes it’s just easier to watch someone else do it first. I really hope this video takes all the guess work out of it for you.
How To Apply your Decal – With Photo’s
What you will need
- Your lovely new Cheeky Monkeys Decal.
- Your “Item” (eg bottle or lunch box …etc).
- A Credit card or a similar card.
- Supplied Decal Application Instructions Card.
- Supplied Alcohol Wipe.
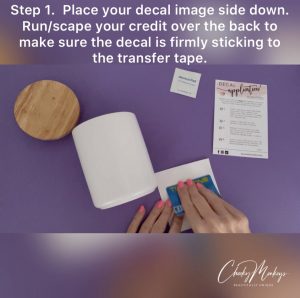
Step 1
- Place your Decal and image side down and slowly run / scrape your credit card over the back to make sure the decal is sticking firmly to the clear transfer tape
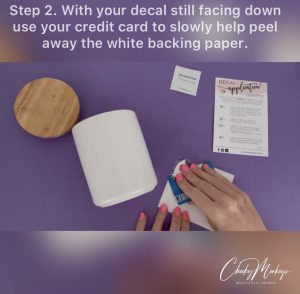
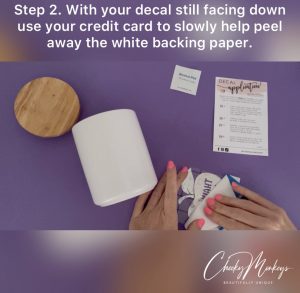
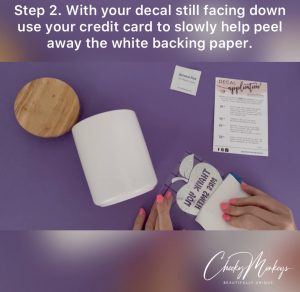
Step 2
- Carefully peel off the white backing layer from the decal.
- Your Decal should stick to the clear transfer tape. If for some reason parts of the Decal do not stick to the transfer tape – then please redo Step 1 again. Sometimes you may need to scrape and peel as you go, to make sure the whole Decal sticks.
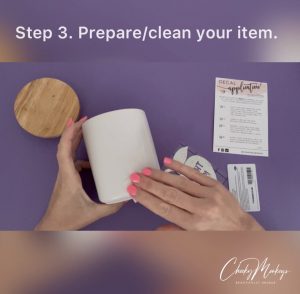
Step 3
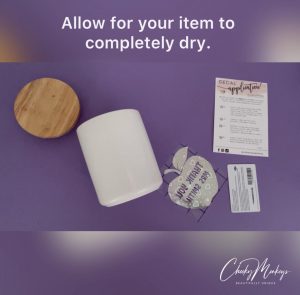
- Prepare / Clean your (Application area) “item” with the alcohol wipe (Provided) and allow for it to dry completely before going to step 4.
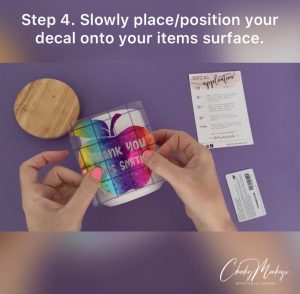
Step 4
- Slowly place / position your decal onto the surface starting from one side or middle depending on the surface.
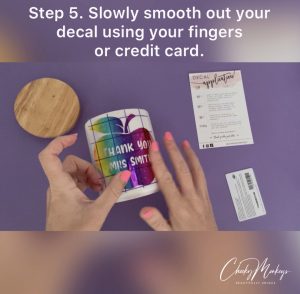
Step 5
- Using a credit card and/or fingers slowly, but firmly, smooth out your decal making sure of a strong bond

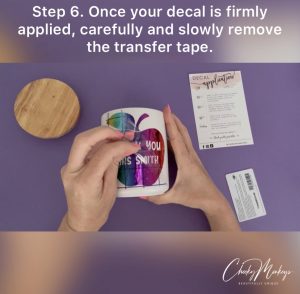
Step 6
- Once the decal has been firmly applied carefully remove the clear transfer tape by peeling it off, starting from the corner.
- Rubbing and checking us you go.


Step 7
- Please leave your Decal to cure for 48 hours before hand washing your “Item”.
Washing Instructions
- Please do NOT put your decal into the Dishwasher or Microwave. Heat will damage it.

Wahoo… it’s now time to sit back and admire your lovely new decal


Thank you for your order
